Audio Digital Face 2 Metadata
When you transfer audio formats with two faces, the transcode script isn’t able to handle uploading the Digital Face 2 details accurately. This issue largely implicates ⅛” audiocassette transfers, but is also applicable to some ¼” audio transfers.
In relation to this article, the transcode engine generally accomplishes the following tasks:
- Extracts metadata from the digital files
- Embeds that information into appropriate Salesforce fields
- Creates derivatives
One major drawback is the inability for the transcode script to distinguish between Face01 and Face02 details when both digital file names share the same BAVC barcode. For example, a typical audiocassette with two faces will produce two .wav files:
- BAVC1000001_Face01
- BAVC1000001_Face02
The transcode engine will review all information for preservation object BAVC1000001 and mistakenly import Face02 metadata into Digital Face 1 fields. This likely occurs because digital files are organized numerically, with Face02 file details being the last information the transcode engine reads to perform Salesforce import commands.
To fix this issue, you have to manually correct Digital File 1 and Digital File 2 audio metadata details in Salesforce. You can find all the required metadata in the mediainfo.csv file.
Finding the mediainfo.csv file
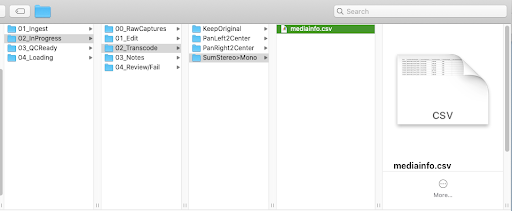
You produce a mediainfo.csv file when you run the transcode engine script. The mediainfo.csv file will live in the transcode folder you designated for each item. For example:
PV22_TransferProject → 02_InProgress → 02_Transcode → SumStereo>Mono → mediainfo.csv

Using metaHarvest.py
If you have not located the file, or for any reason no longer have this file available in the SAN, you can run the metaHarvest.py script to regenerate metadata. The script harvests information from chosen digital files to recreate the mediainfo.csv without having to run the transcode engine again.
(Re)run the Transcode Engine
You can also reproduce a mediainfo.csv file by re-running the transcode engine and creating ‘0’ derivatives. However, running this script again may overwrite details in Salesforce fields and is only suggested in extreme cases, i.e. the above scripts break.
Using sfsync.py - NOT RECOMMENDED
Using this script will upload metadata from the mediainfo.csv into Salesforce fields. It is not recommended to use this script, as Face02 details will be overlooked and/or incorrectly applied in Face01 fields. Additionally, running this script after using the transcode engine may overwrite important details necessary for the QC process.
Opening the mediainfo.csv file
Locate the mediainfo.csv file. You can open with the following:
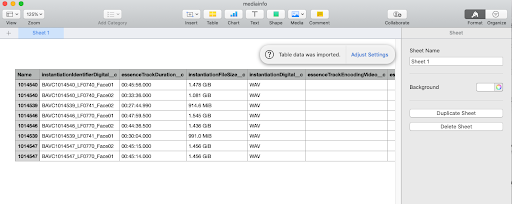
Numbers
Open with → Numbers. You can set this as your default option.

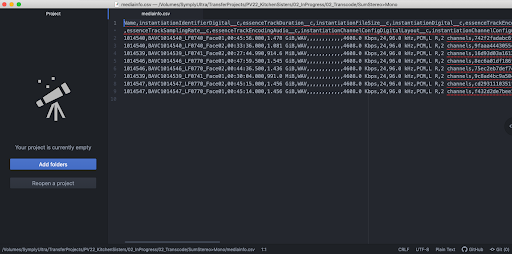
Atom
Open Atom to an untitled project. Then, drag the mediainfo.csv file into the window. You will see each digital file’s metadata details displayed in plain text, each field separated by a comma.

TextEdit
Open with → TextEdit. Like Atom, the metadata is separated by commas. You will see in this example that both BAVC1014540_Face01 and BAVC1014540_Face02 each have their own unique details.

With any option above, manually select and enter these metadata fields:
- Digital File Name
- Digital File Duration
- Digital File Size
- Checksum
In Salesforce, Face01 details are filled in the DIGITAL OBJECT ELEMENTS section. Face02 details are filled in the AUDIO FACE 2 FILE DETAILS section.